
Quick Start
From a fresh install to your first report in a few minutes.
- Install and activate the plugin, then enter your key under Tools > Ability Auditor License (see Installation and License).
- Go to Tools > Ability Auditor. Before the first audit you see a “No audit yet” message. The Inventory tab already lists every registered ability if you want a look.
- Click Run audit at the top of the screen. The audit takes a few seconds; it checks every ability’s permission callback as each role.
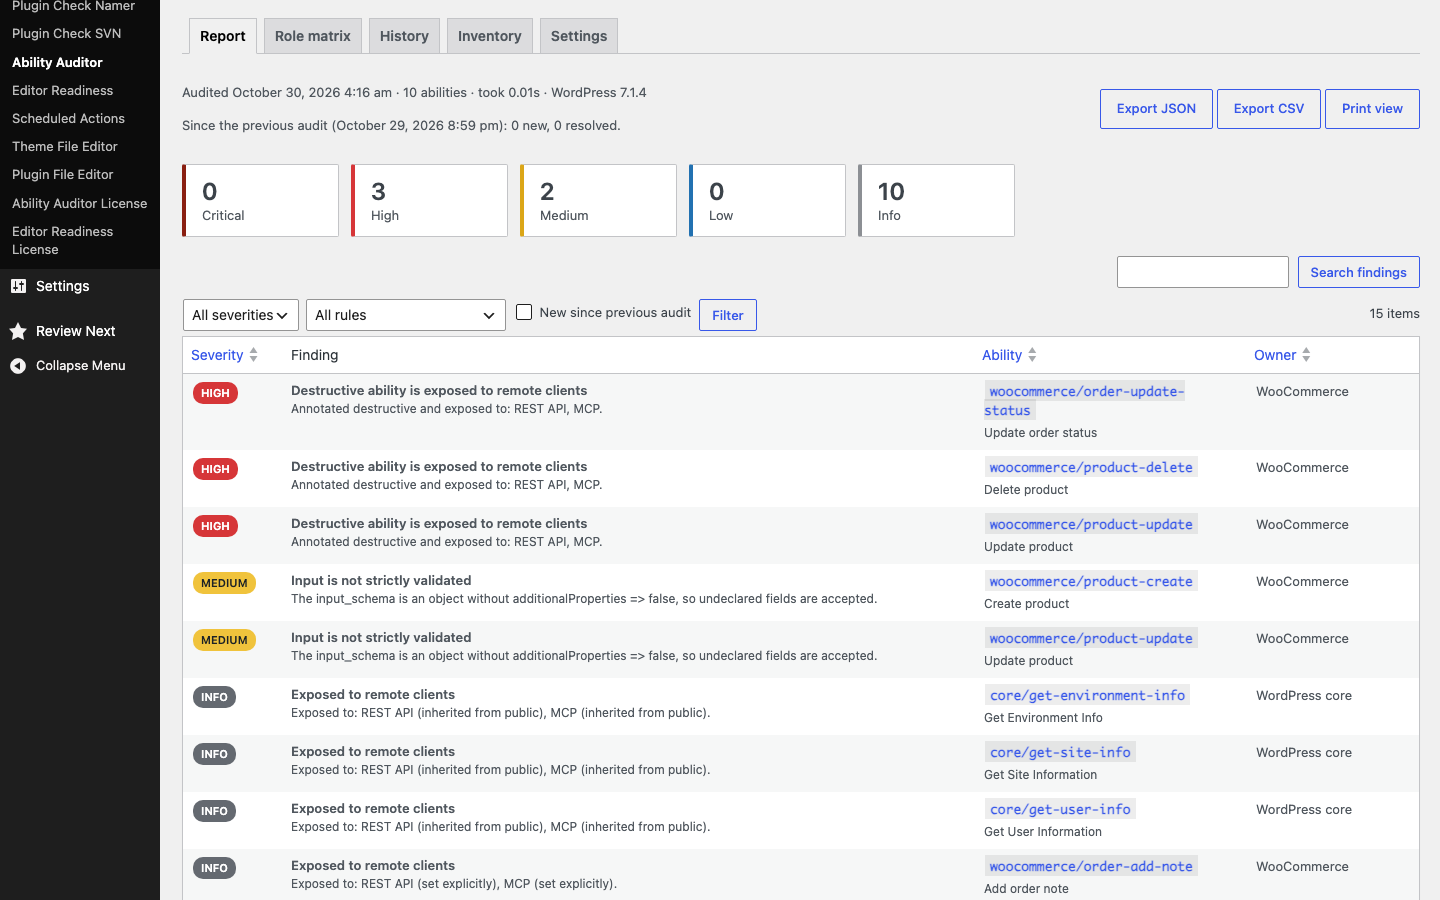
- You land on the Report tab with a success notice (“Audit complete: N findings”) and summary cards showing how many Critical, High, Medium, Low and Info findings there are.
- Click a severity card, or use the filters above the table, to narrow the findings. Start with Critical and High.
- Click an ability name to open its detail panel: who can run it, where it is exposed, why each finding matters and how to fix it.
- When you are done, use Export JSON, Export CSV or Print view to share the report.
- Open the Settings tab to confirm that the daily audit and email alerts are on (they are by default).
Run the first audit on a staging copy if you have many third-party plugins. Ability Auditor contains badly written permission callbacks as far as it can (output, notices and wp_die() are captured, execution is blocked), but a permission callback is still third-party code.
Was this article helpful?
Tell us what was missing