
Adding tracking numbers to orders
Each shipped order gets its own tracking number and carrier, entered on the order screen.
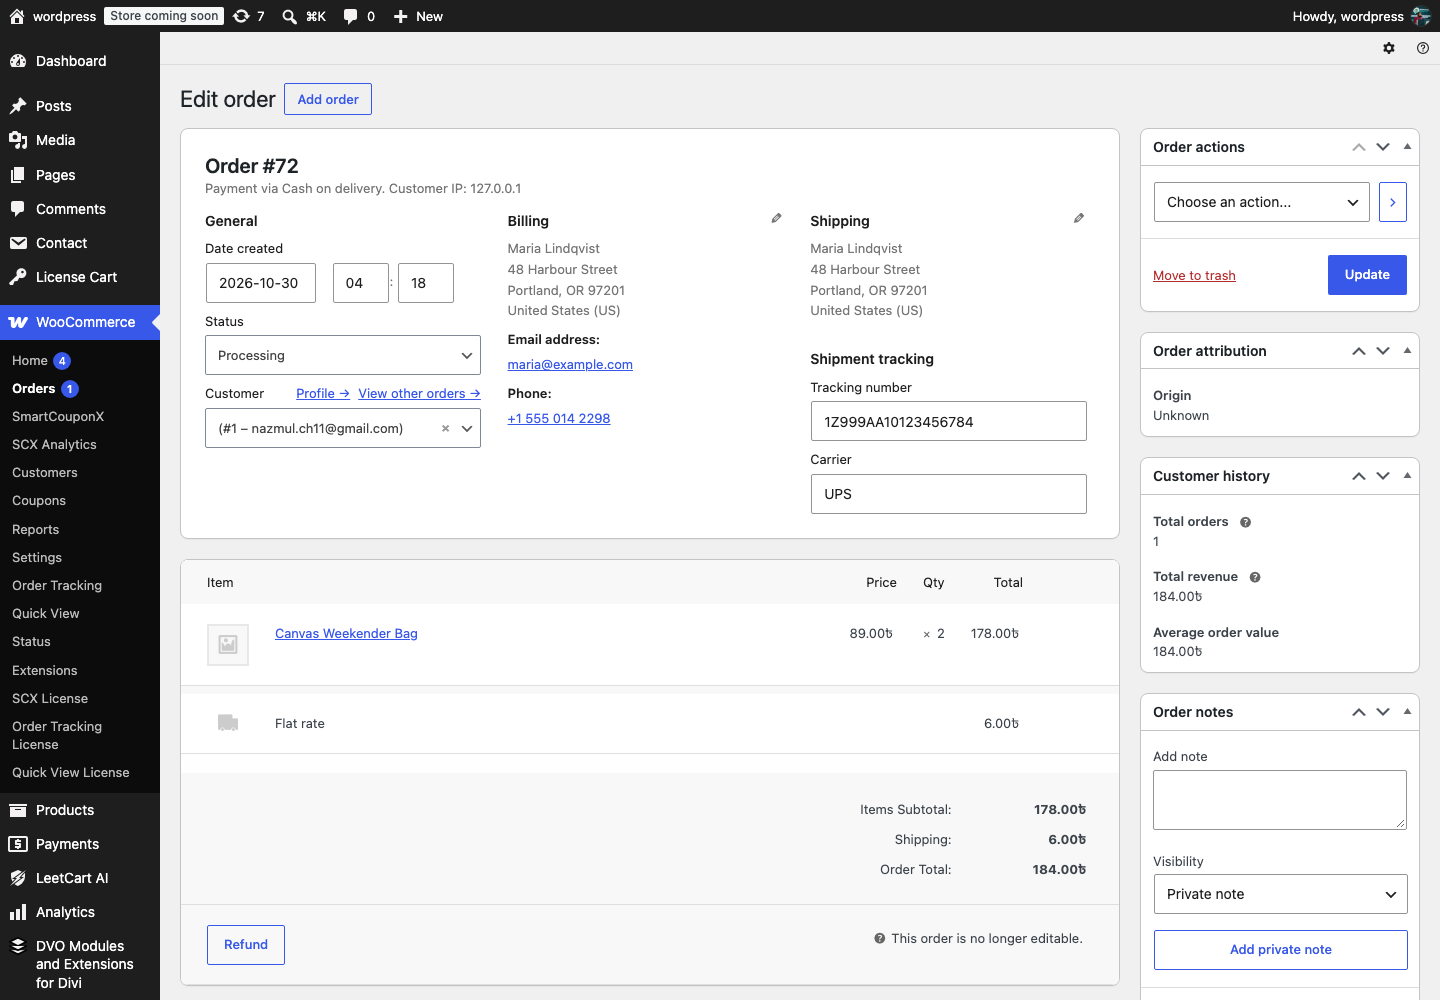
Steps#
- Go to WooCommerce → Orders and open the order.
- Below the shipping address you will find a Shipment tracking box with two fields.
- Enter the Tracking number exactly as the carrier gave it to you.
- Enter the Carrier name. As you type, the carriers from your settings are suggested; pick one so the name matches and the right link template is used. You can also type any other carrier name, in which case the generic link template applies.
- Click Update to save the order.
To remove tracking from an order, clear both fields and click Update.
Where the values are stored#
Both values are saved as order meta through the WooCommerce order API, so they work with High-Performance Order Storage (HPOS) and the legacy post storage alike. The meta keys are _leet_ot_tracking_number and _leet_ot_carrier. Only users who can edit orders can see or change the fields.
The plugin does not send an email when you add a tracking number. Customers see the tracking link when they look up the order on your tracking page. If you want to notify customers, add the tracking page link to your WooCommerce “Completed order” email text under WooCommerce → Settings → Emails.
Already storing tracking numbers with another shipping plugin? You do not have to enter them twice. A developer can feed them to the tracking card with the leet_ot_tracking_info filter; see the Developer reference.