
Quick Start
From a fresh install to a working tracking page in a few minutes.
- Install and activate the plugin, then activate your license under WooCommerce → Order Tracking License (see Installation).
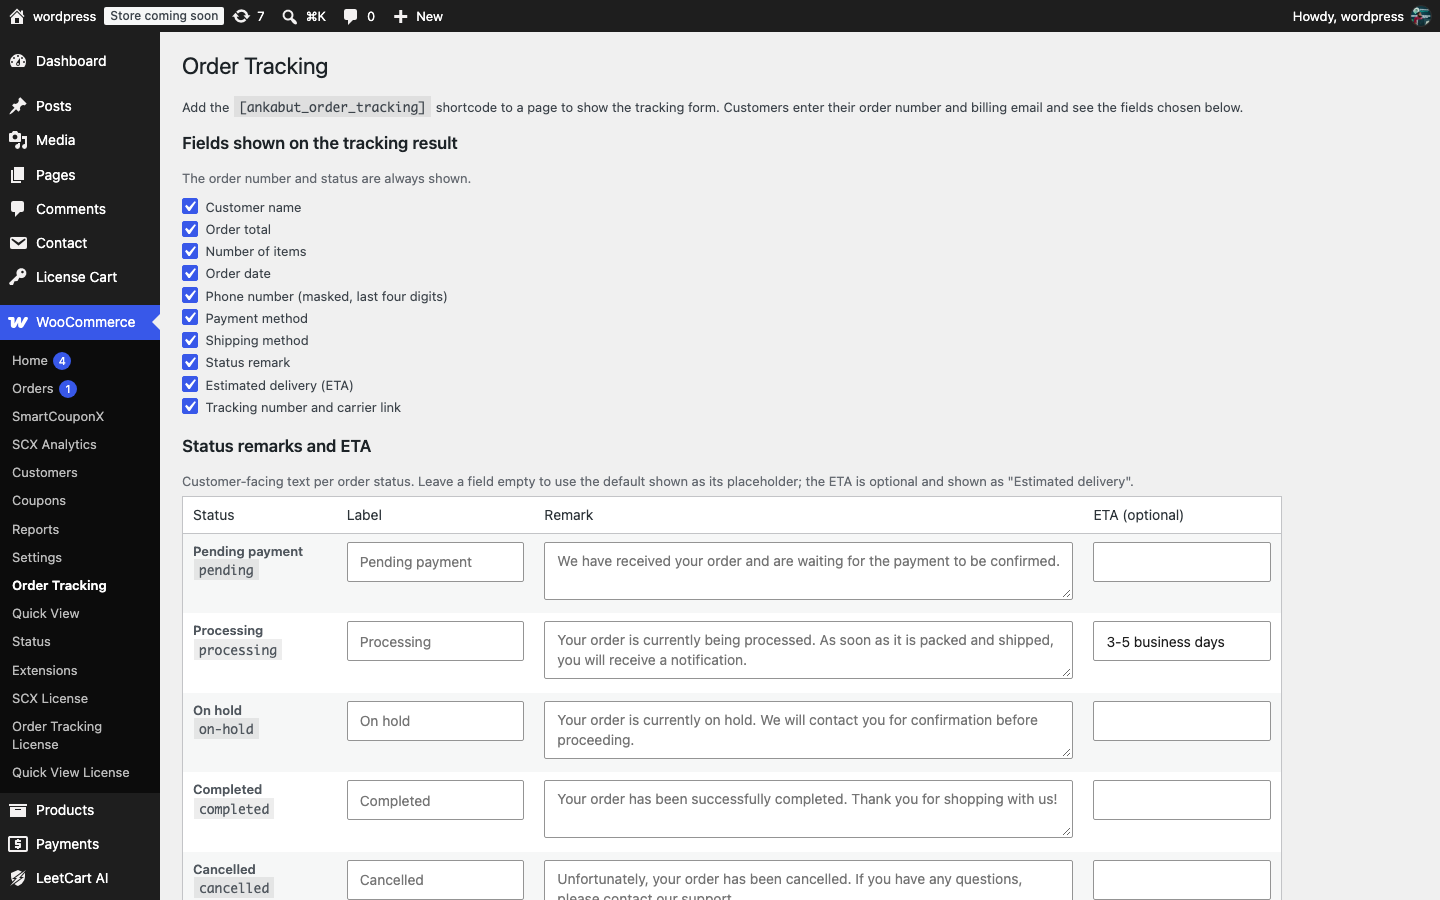
- Go to WooCommerce → Order Tracking. Review the Fields shown on the tracking result checkboxes; all fields are enabled by default.
- In the Status remarks and ETA table, adjust the label, remark and ETA for the statuses you use most (for example add “3-5 business days” as the ETA for Completed or Processing). The defaults shown as placeholders are used for anything you leave empty.
- Check the Carrier tracking links list. The five preset carriers are ready to use; add your own carriers as
Name | URLlines. Click Save Changes.
- Create a page called “Track your order” (Pages → Add New), add a Shortcode block containing
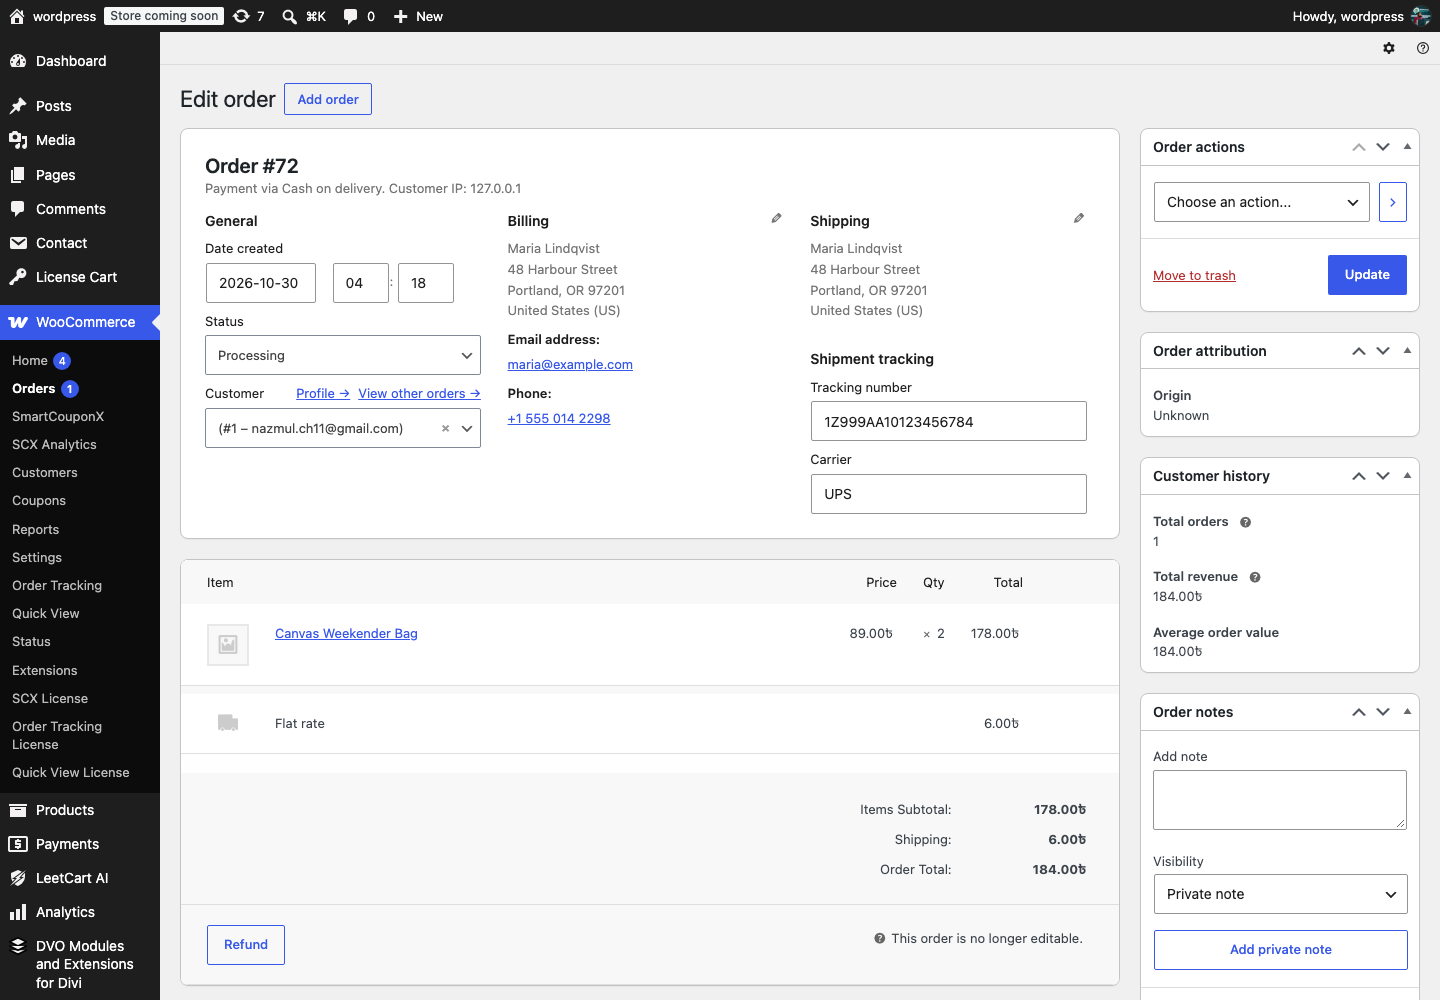
[leet_order_tracking], and publish it. - Open an order under WooCommerce → Orders. Below the shipping address, under Shipment tracking, enter the tracking number and carrier, then click Update.
- Visit your “Track your order” page, enter that order’s number and billing email, and click Track Order. You will see the tracking card with the status, remark, ETA and a clickable tracking number.
- Add a link to the page in your site menu or footer so customers can find it.
Was this article helpful?
Tell us what was missing