
Quick Start
From a fresh install to your first report in a few minutes.
- Install and activate the plugin, then activate your license (see the two previous articles).
- Go to Tools → Editor Readiness. Before the first scan you will see a notice reminding you that the runtime check opens the editor in a simulated state. If any installed plugin’s editor code is untrusted, switch to a staging copy of the site first.
- Click Run scan. A progress bar shows which post type editor is being simulated, then which plugin or theme is being read and how many files have been scanned.
- Keep the page open for the fastest scan. If you close it, the scan continues in the background and you can reload the page later to see the result.
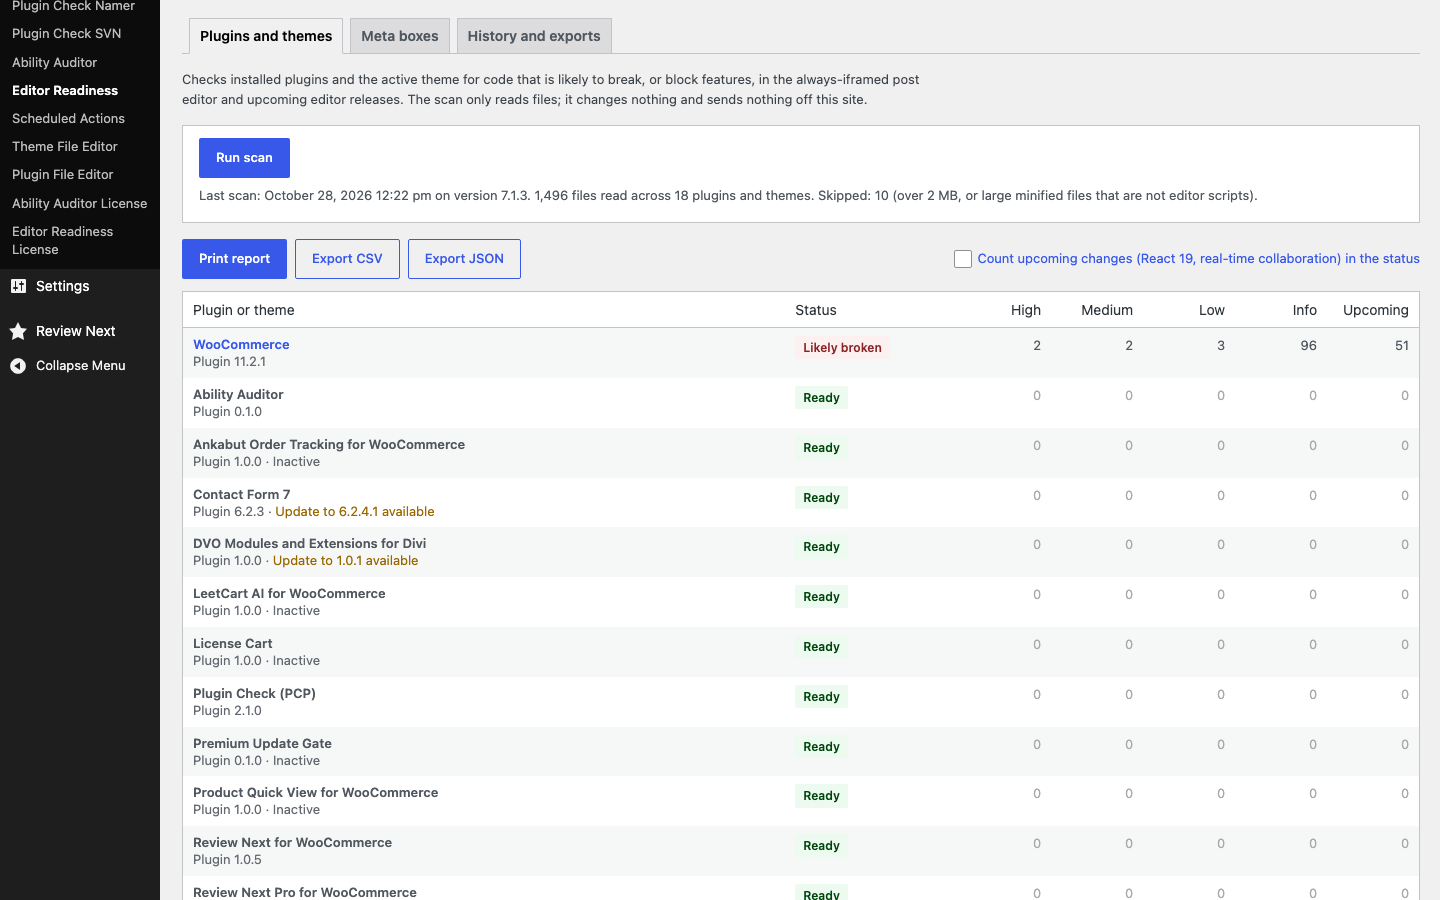
- When the scan finishes the page reloads and shows the Plugins and themes summary: one row per plugin and theme, sorted with Likely broken first, with counts of High, Medium, Low, Info and Upcoming findings.
- Click any plugin or theme with findings to open its detail page: each rule, why it matters, how to fix it, and every file and line.
- Open the Meta boxes tab to see which classic meta boxes will turn off real-time collaboration on each post type.
- Click Print report for a client-ready page you can print or save as PDF, or Export CSV / Export JSON for a spreadsheet or your own tooling.
A finding is a pointer for testing, not proof that a plugin is broken. Before you report a finding to a plugin author, confirm it on a staging copy with the WordPress version you are planning to update to.
Was this article helpful?
Tell us what was missing